First step to start you Messenger store – 「Products」
In 「Products」 settings, other than allowing you to add new products efficiently, you can also manage its availability in just one-click. Also, you are able to check on statistics such as view, click and purchase anytime.
Get your products ready, let’s roll!
STEP 1- Hit 「Add Product」

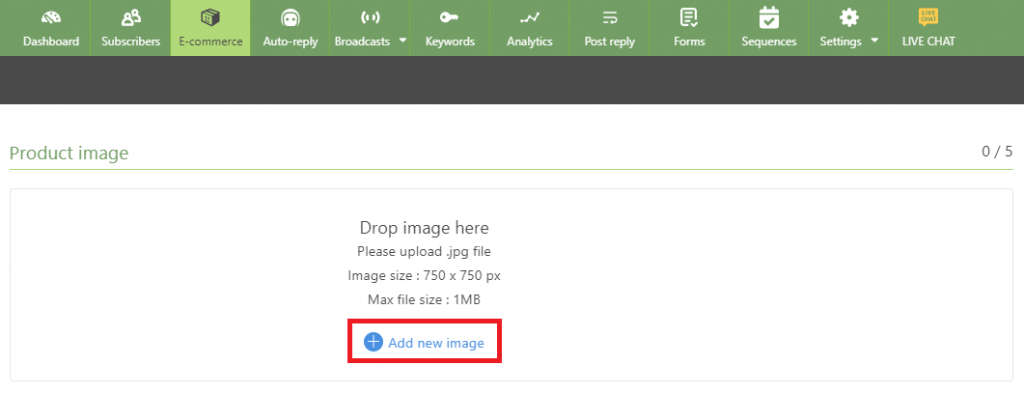
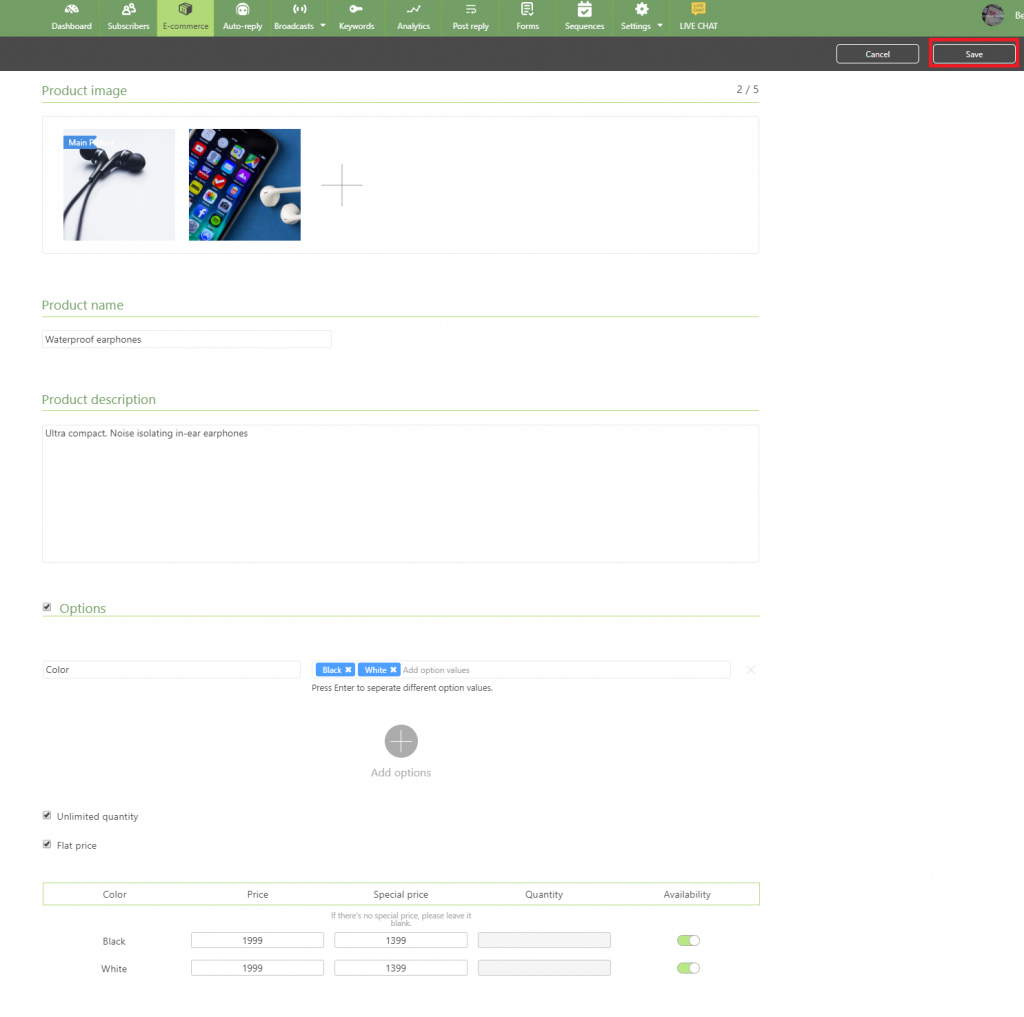
STEP 2- Add product images
Upload up to 5 images at one time, maximum 1MB each (Image framed at 750×750 pixels)
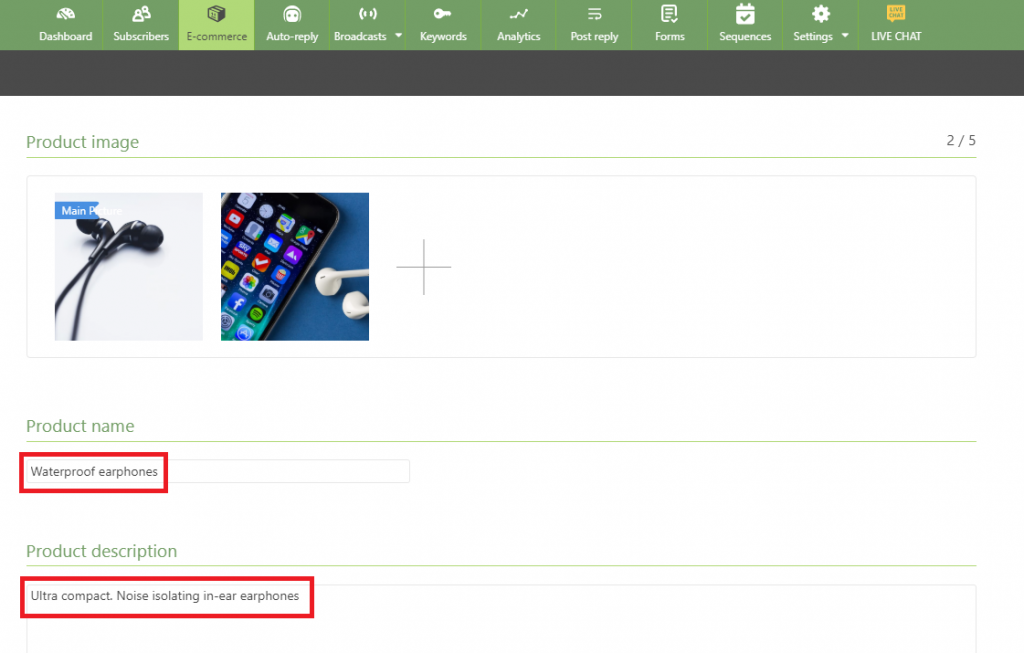
STEP 3- Enter 「product name」 & 「product description」
Product name is limited to 135 words, product description is limited to 4000 words.
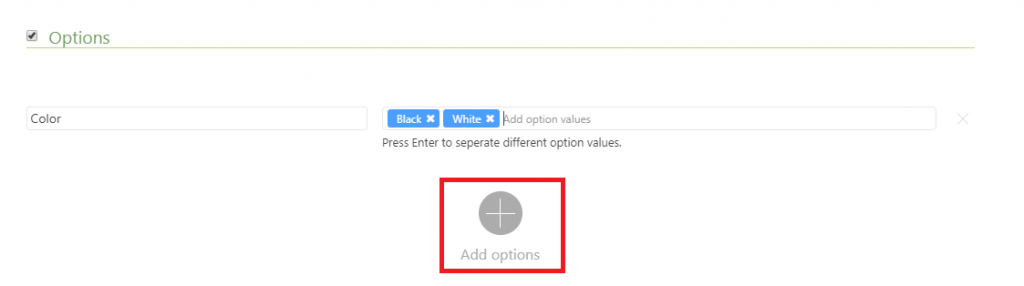
STEP 4- Add new options to your product– Depend on style provided.
Instruction – Enter 「Option name」 in the left cell (e.g., color & size). Enter 「Option value」 in the right cell (e.g., black, white or S,M,L).
Remark – About 「Options」
「Option name」 is limited to 2 categories(such as color and size), but 「Option value」 is unlimited.
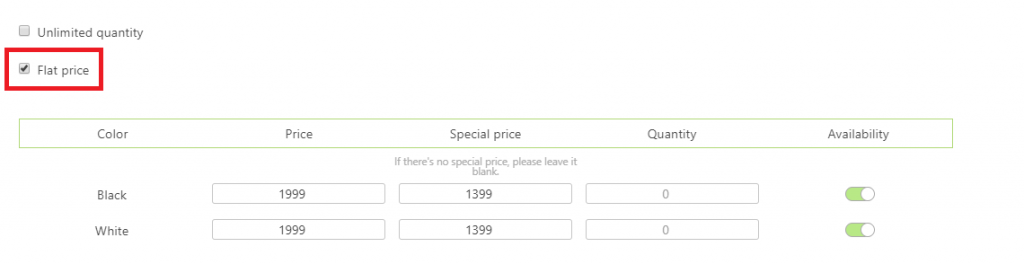
STEP 5- Set a 「Price」 – Enter either selling price or special price
As a result, a price list of different product options will be automatically created below (e.g., S Black, M Black, L Black, S White, M White, L White). You can set different prices for each product option here.

Remark: About 「Special price」
After setting ‘special price’, customers will see both selling price & special price at the same time. It is easy to increase their impulse buying intention when driven by promotion.
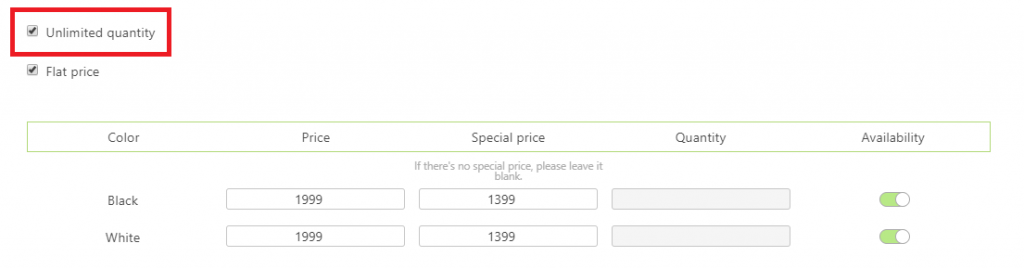
※ If a same price applies to all different product options, tick ‘flat price’, you only have to fill out the price once.
STEP 6- Set 「Quantity」 of the product– Number depends on stock available

※ If the product has no limit of quantity, tick ‘Unlimited quantity’
STEP 7- Hit 「Save」 – Done!
Next, back to the list and view all products
You are able to view all products in your inventory here. You can also check on views, clicks and purchases of each product anytime. As simple as that, isn’t it?

If you wish to edit the product afterwards, simply hit the ‘pencil’ icon on the right to continue editing. ‘Availability’ switch in the middle allows you to manage the status of product, once you turn it off, the product will no longer be available.
Each product will generate its own ‘product link’, it brings customers directly to Messenger to see more product description, they can also add the product to cart and checkout in Messenger.
Advanced Reading: How to get your first order?
You can manage the availability of each product in the product list. However, if you wish to manage the availability of particular product option (e.g., ‘Black’ bluetooth earphones), you’ll have to hit the ‘pencil’ icon to continue adjusting the status of different product options respectively.
※ Image below for example, every product option has its own ‘availability’ switch. If the ‘black’ bluetooth earphones have been sold out, you only have to turn off its particular availability switch. As a result, customers will notice the ‘black’ bluetooth earphones are out of stock.

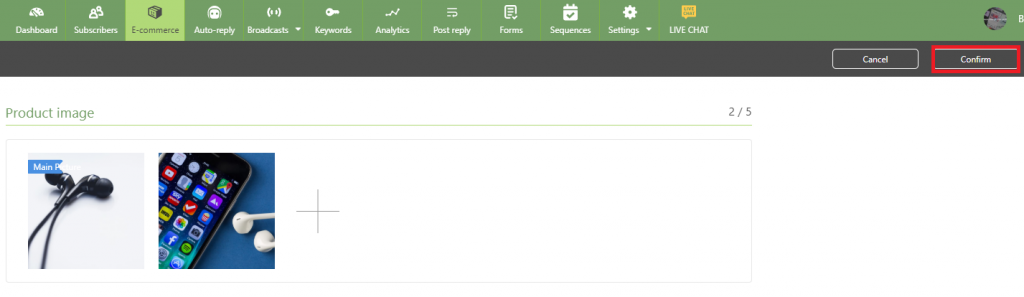
※ Don’t forget to hit 「Confirm」 after editing!
Kind reminder
Make sure to hit 「Confirm」 after making any changes to the product, or else the data won’t be saved successfully!
Congratulations, you’ve set up 「Products」 successfully!
In general, businesses tend to start on-line stores on E-commerce platforms or build a website by themselves. Considering these simple steps above, why not give chatbot a try?
Still struggling with lack of I.T. knowledge, budget, and time to start your first online store? Hesitate no more! With CHATISFY, build your inventory and start selling right away!
After building products inventory, you must be curious about how to set up shipping and payment. Put your feet up, with CHATISFY, we provide a complete and whole shipping and payment system to solve your problem efficiently and effortlessly.