Final step to start your Messenger store – Launch it!
When it comes to CHATISFY Messenger store, there are 2 ways to attract customers to shop. One is use ‘product link’ to direct your customers to your store, the other is to insert products to the conversation flow, let customers interact with bot and do the shopping at the same time.
Both methods enable your customers to browse and checkout in Messenger, let’s take a look.
Method (1) : use「product link」to direct your customers
Inviting customers to click the link through posts updated on Facebook page or private message.
After adding new products, each product has its own exclusive link. This link brings customers directly to shopping page in Messenger. It is simple yet effective, bringing customers to product page in a click.

「Products」 List – Product link
Advanced Reading – How to add new products? : Build Up Your “Product Inventory”
The easiest way is to attach product link in either post or private message to attract customers. For example, latest XX on sale, latest XX promotion and etc., and attach product link at the end.
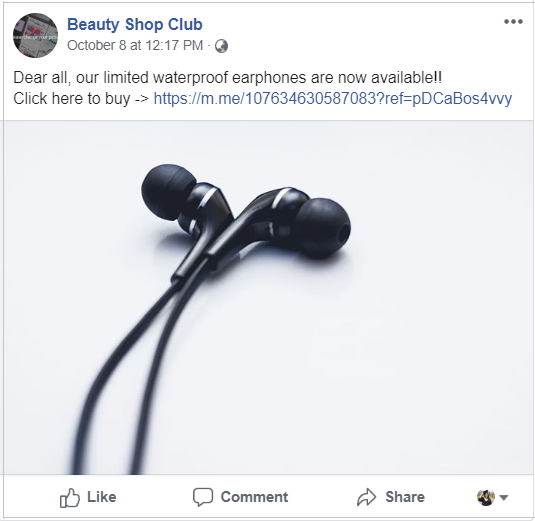


Demo- Product link attached in post
※ Click the link to see more product details on product page in Messenger.
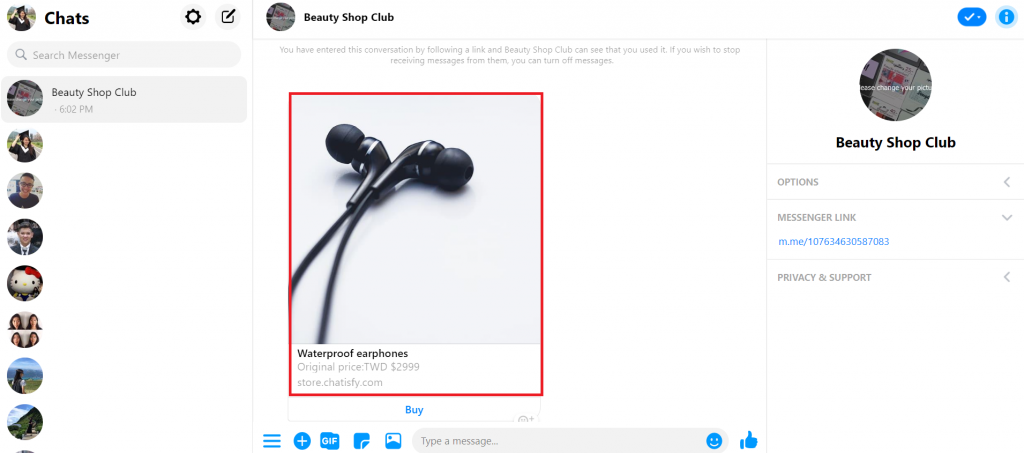


Click the link – proceed to product page
Method (2): Insert products into 「chat flow」
Inserting products to conversation through 「Auto-reply」 allows customers to browse & purchase.
A systematic and convenient shopping flow is more essential in a business. In addition to allowing customers to view the products they like, you can also design a more interesting content using 「Auto-reply」.
※ A simple example (as image shown below), if you’re a merchant who sells 3C products, you can divide products into 3 main categories, ensuring customers to pick products they’re interested in effortlessly.
For instance: click ‘Wireless products’ button and customers will see ‘Waterproof wireless earphones’.
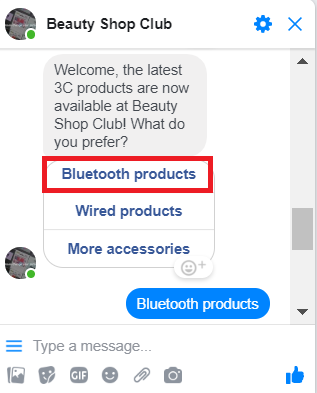


1- Click ‘Wireless products’.
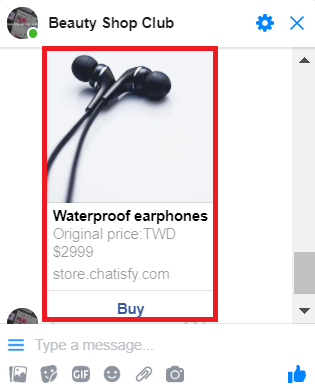


2- Waterproof wireless earphones pop up.
➤ To design the example above, please refer to the following steps:
Step 1- Set a welcome message: a guiding message for new customers.
Divide the 3C products you’re selling into categories, (Wireless products, wired products and accessories) enter guiding message that lead customers while browsing, and save.
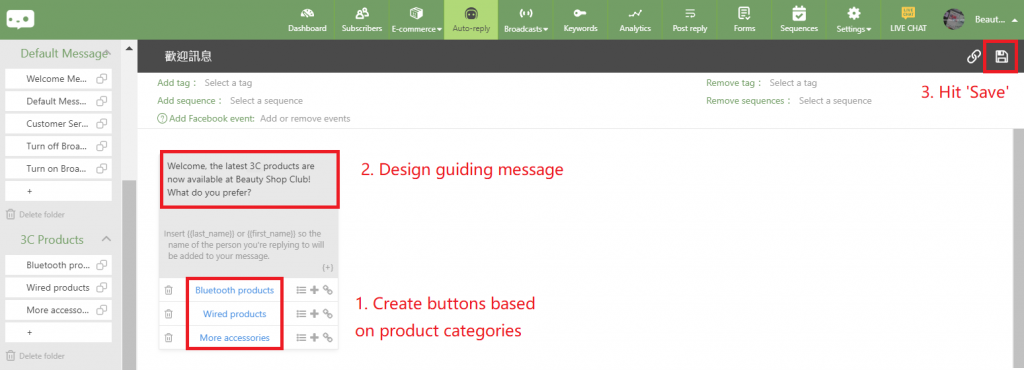


Step 2- Select the products to be inserted: Add one or more items
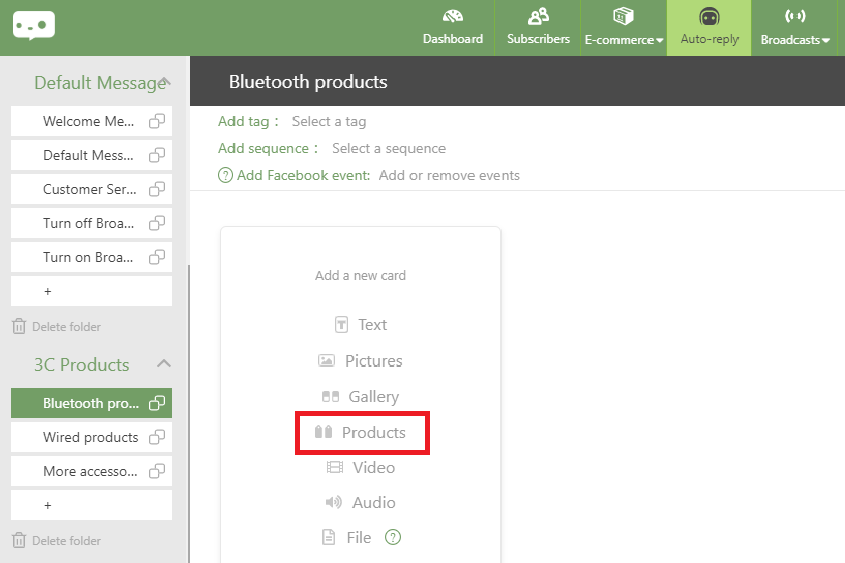
Create respective blocks according to 3 categories, then insert respective products. Take ‘wireless earphones’ should be inserted to ‘wireless products’ as an example:
(1) In ‘Wireless Products’ block, click 「Products」.


(2) Select the products to be displayed: ‘Waterproof wireless earphones’, you can select multiple products at once.
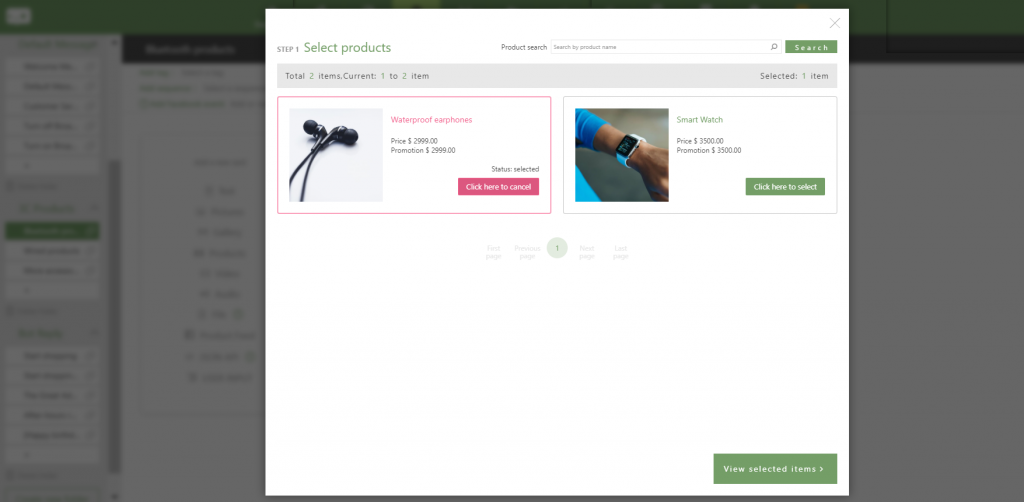


(3) Click the buttons at the bottom-right corner: ‘View selected items’ & ‘Confirm and add to card’.
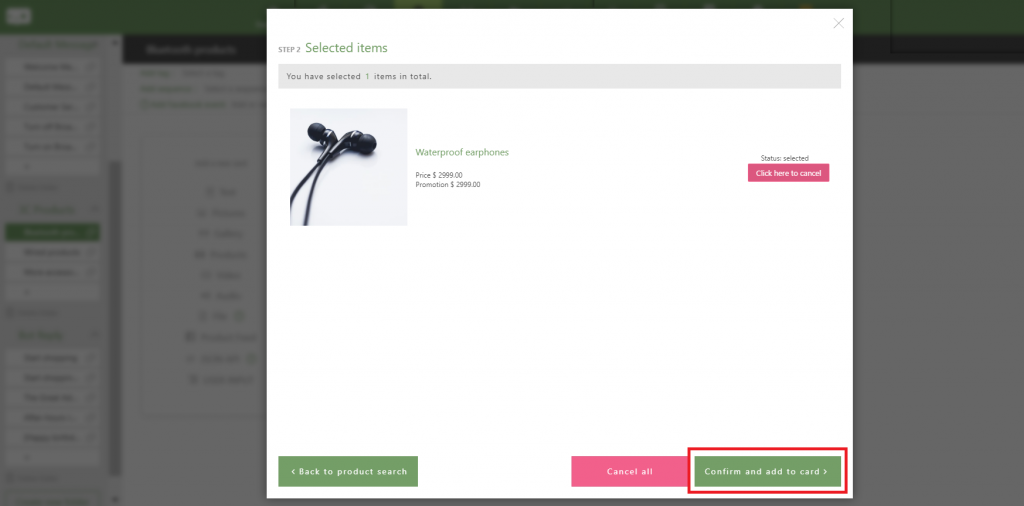


(4) Click ‘save’ at the top-right corner: “Waterproof bluetooth earphones” have been inserted successfully.


Step 3- Back to 「Welcome message」: Link up the buttons & products.
Take ‘wireless products’ button should link to ‘wireless earphones’ as an example:
Back to 「Welcome Message」, click the ‘+’ icon next to ‘Wireless products’, select the block with products attached you created previously, and click ‘save’. As a result, customers would be able to view products after clicking button.
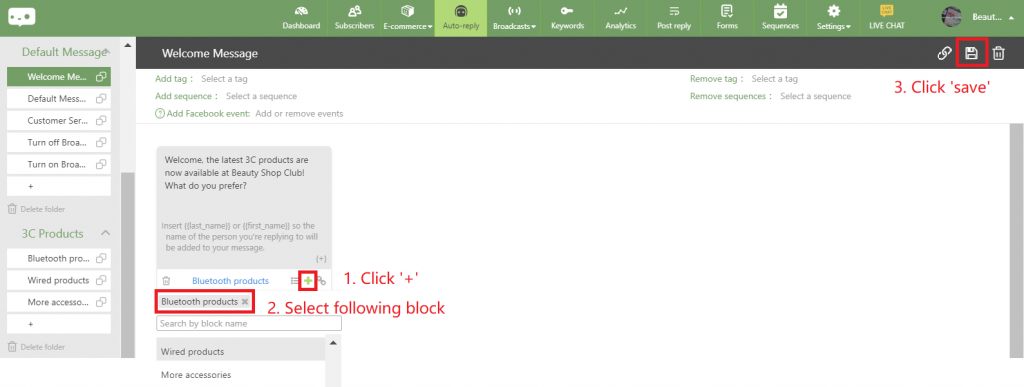


The same instructions apply to other categories and products as well. Eventually, you will own a fully structured and sell 24/7 business as long as you follow the steps one by one.
Don’t forget to set up payment and shipping system before launch : Set Up “Payment and Shipping” In One Page
➤ Useful tips: Add some sparkle to your business!
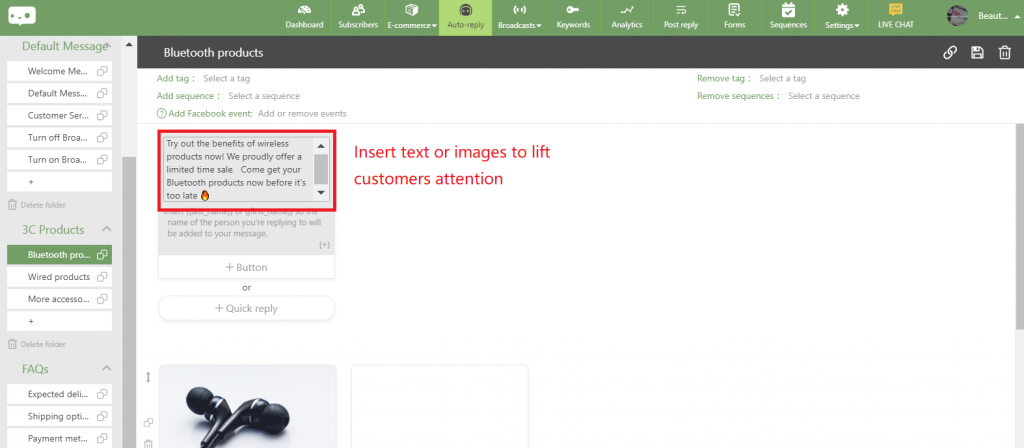
One of the advantages of designing chat flow in 「Auto-reply」 by yourself is, you can create a more lively & richer content. To develop a complete shopping experience, providing only products may be unattractive and dull to customers.
Therefore, you are encouraged to insert more text messages, images or other content to increase attraction.
※ As the image shown below, you can add more introduction or luring copywriting to draw customers attention. (Such as Free trial, Limited time sales on all products, Don’t miss it and etc.)


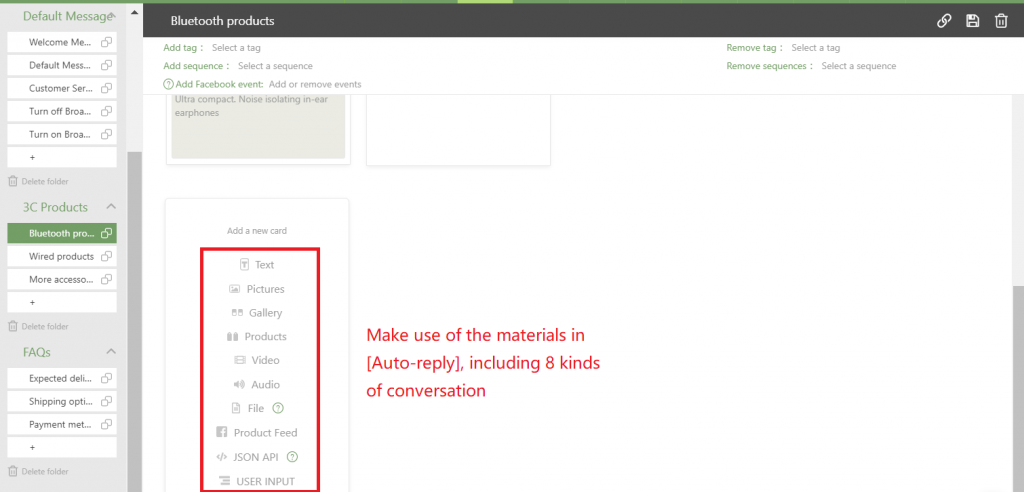
Moreover, you can also make use of other templates in 「Auto-reply」, including images, videos, audios, files, catalogues to create a more attractive content!


Next: Visit your business from a customer’s point of view!
After understanding the selling methods, let’s take a look at the process of purchasing.
➤ Shopping flow: Go to Messenger > Click ‘Buy it!’ > Fill in order details > Order completed
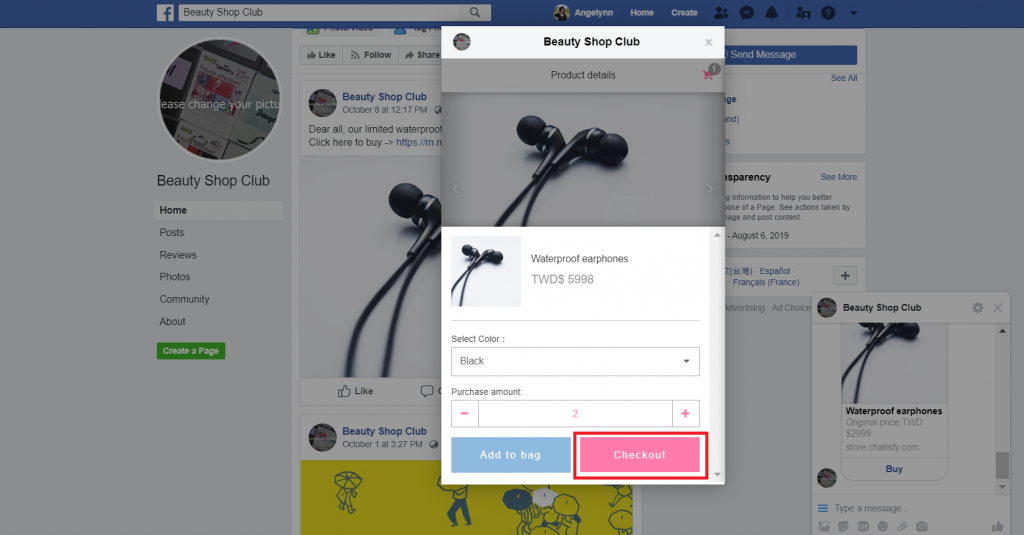
(1) Browse products: By clicking ‘Buy it!’, customers could look at the product page, and gain information, such as product name, description, price, shipping and payment methods.
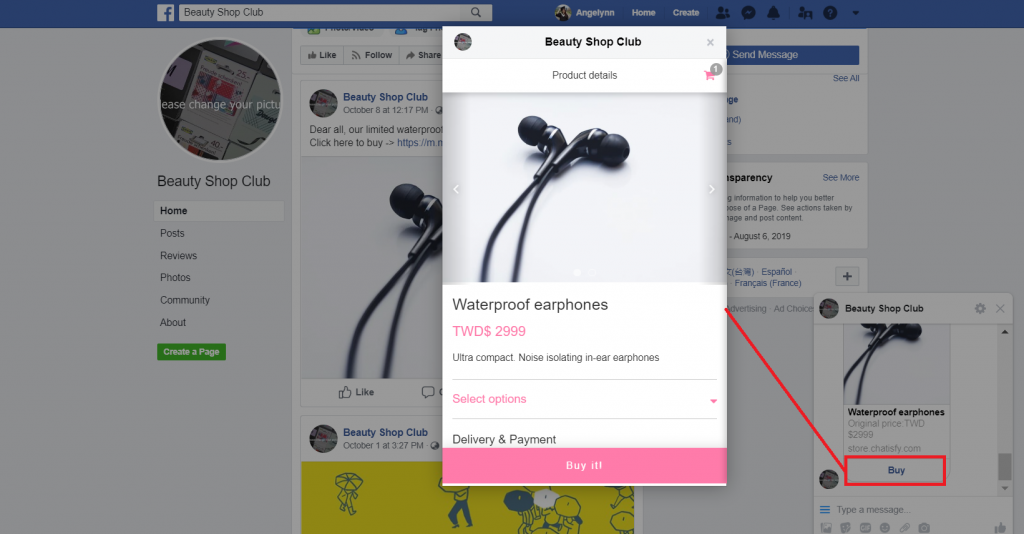


(2) Confirm purchase: Customers click ‘Checkout’ after selecting the quantity of product


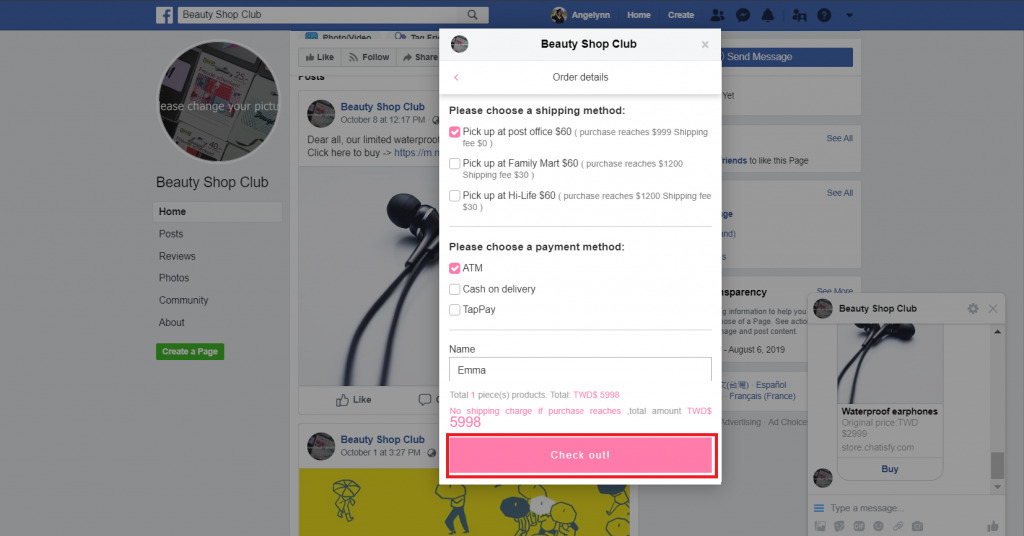
(3) Fill in order details: Customers have to fill in purchaser information.
Information needed includes shipping and payment method, purchaser name, phone number and address, click 「Checkout」.


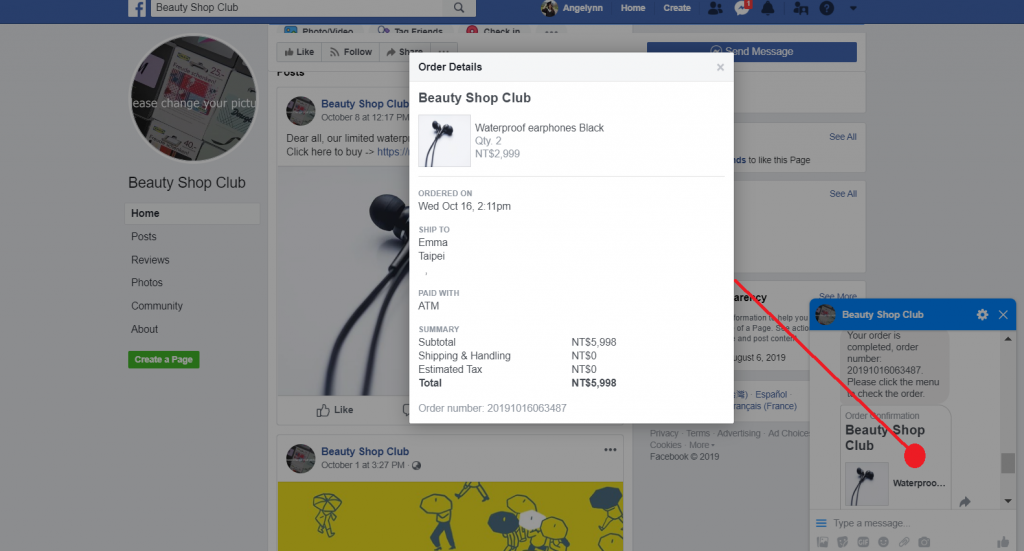
(4) Order completed: After checkout, the system will send an order confirmation, including order number & details. Customers are able to check the information by clicking 「Order details」.


➤ Remark: Also, customers are able to check the information through clicking 「Order status」 in Menu.
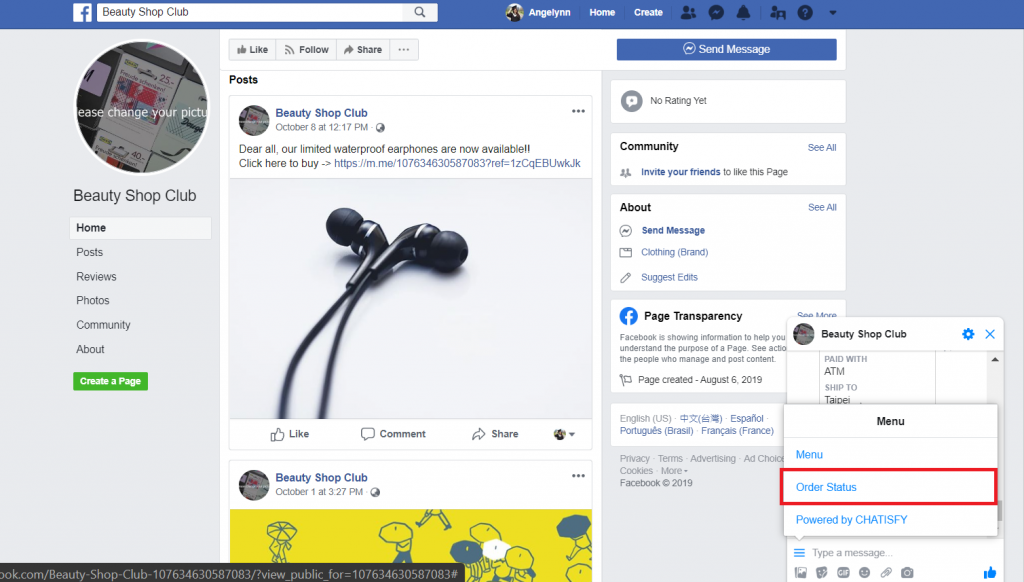


➤ Query page: The system will automatically show the latest order confirmation after clicking 「Order status」.
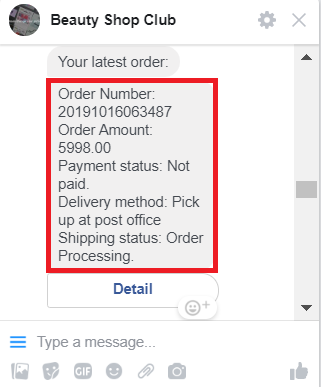


Click 「Order status」 – showing the latest order confirmation
Remark:
As you can see from the shopping demonstration, all the shopping steps customers made are completed within Messenger! Such as browsing products, placing orders, checkout, or even order tracking, they don’t have to visit any website. Customers only have to go to Messenger through Facebook page, and do shopping pleasantly.
➤ No extra cost needed, receiving orders right away with Facebook page!


Congratulations, you’ve officially launched your Messenger store!
Isn’t it cool to build your exclusive online business and let bot do the vending job automatically? With CHATISFY chatbot, there are multiple choices to bring customers to shop in Messenger!
Let’s try and build your own online business now!
➤ Menu : Beginners Guide