Recurring Notifications is a powerful initiated messaging capability on the messenger platform that makes a huge breakthrough to the 24-hour window restrictions among broadcasting. After customers have opted in, you can send messages actively to customers on a daily, weekly or monthly basis. This not only helps drive continuous engagement, but also efficiently increases customer retention rate and boost sales.
** Click HERE to learn more about the advantages and 6 must-known scenarios that recurring notifications can be applied to.
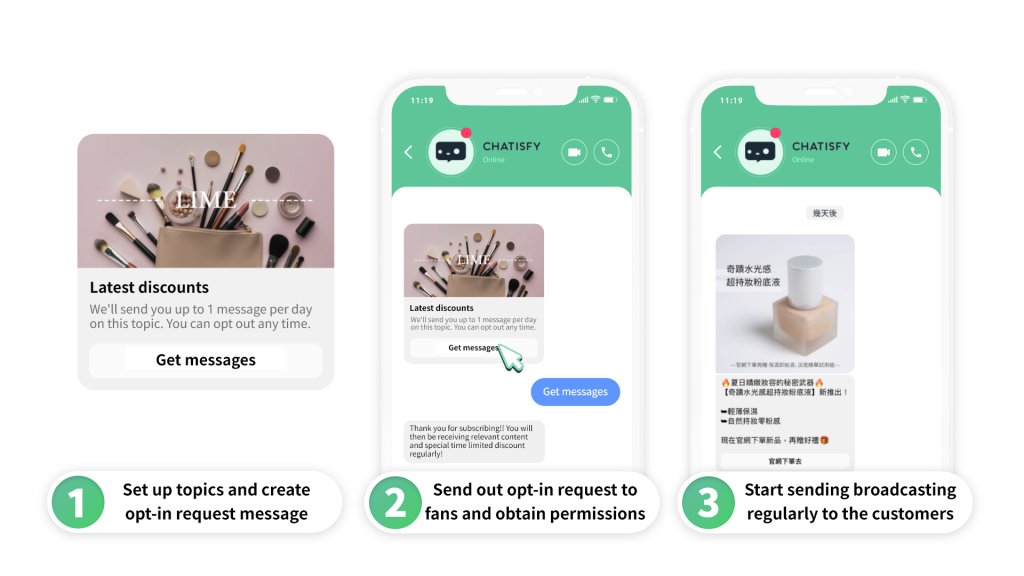
How Recurring Notifications works?
There are three main steps that you need to know about how it works:
Step 1: Set up topics and create opt-in request message
Step 2: Send out opt-in request and obtain opt-in permissions from customers
Step 3: Start broadcasting recurring notifications messages to customers
How to set up Recurring Notifications?
Step 1. Set up topics and create opt-in request message
Tips: A topic can be considered as a message block that is exclusive for opt-in request messages.
**Click HERE to learn more about “Auto-reply block”
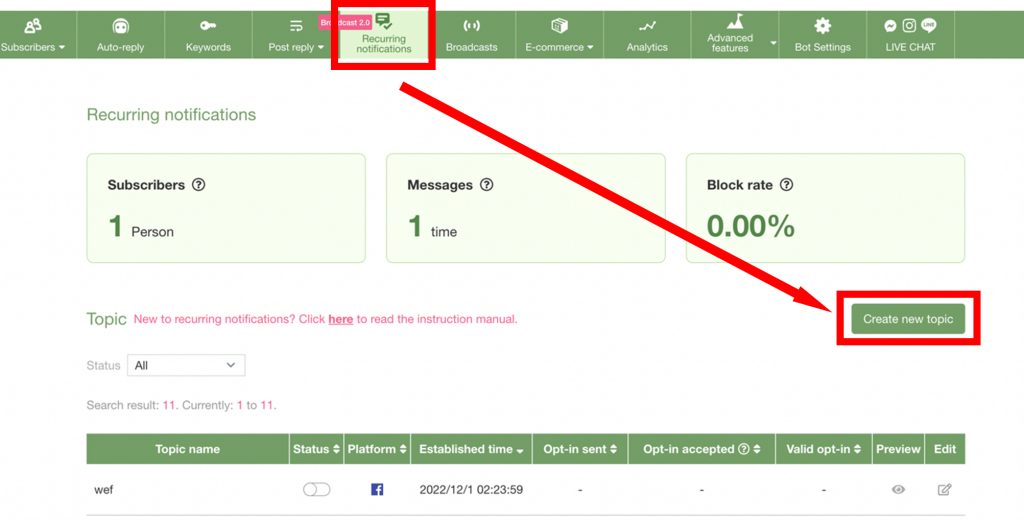
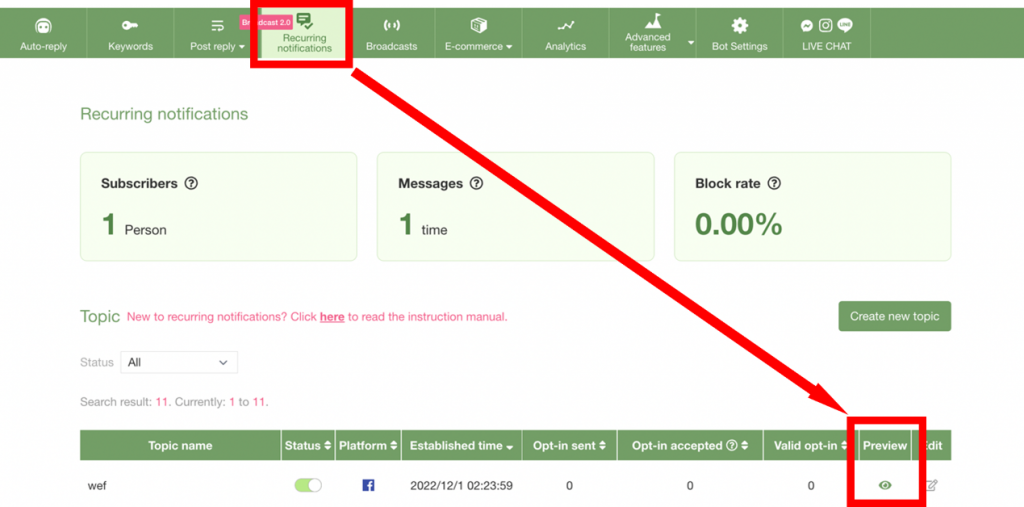
- Click on “Recurring notifications” button on the chatbot toolbar
- Click on “Create new topic” on the right-hand side to enter the topic-setting page
- After entering the topic-setting page, look at the upper part of the page
- Feel free to enter any topic names as this is only to help you distinguish different topics and it will not be seen by customers
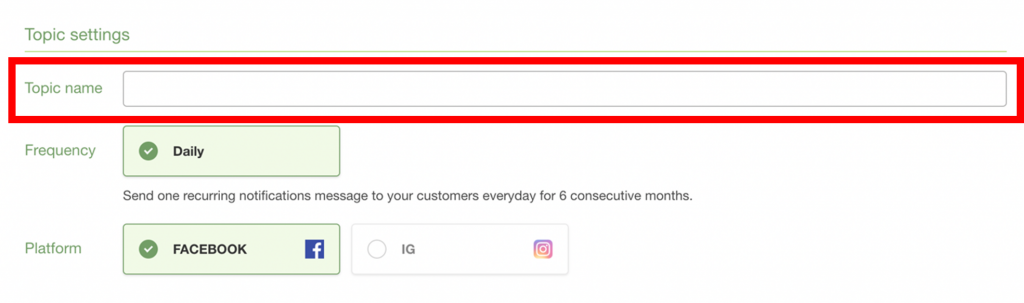
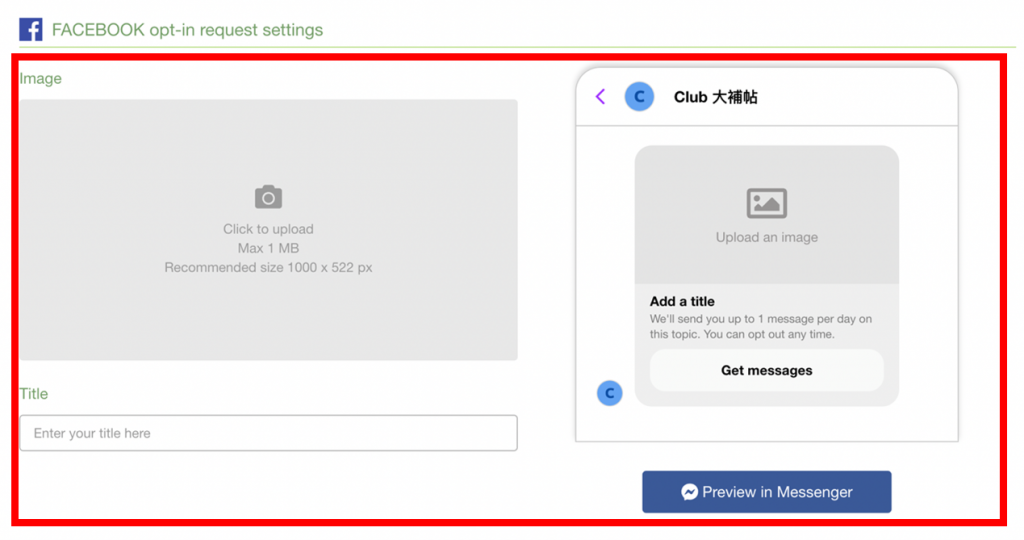
- Upload an image and type in your title for this opt-in request message
Tips: The content and words on the button are by default officially set be Meta, thus may not be changed.
Tips: The picture displayed in the preview window on the right-hand side shows how the message will look like afterwards.
Tips: Click on the “Preview in Messenger” button underneath the preview window to receive the opt-in request by yourself.
- You may also add tags to the opt-in request block and set up success message to make the conversation more complete
Tips: A “Success message” is a block that will be triggered after customers have opted in. You can consider it to be a follow up message to reconfirm the subscription with the customers and can provide buttons to facilitate continuous conversations.

- Click “Save” on the upper right of this page to finalise the setting of this topic
Step 2. Send out opt-in request and obtain opt-in permissions from customers
There are three ways for CHATISFY’s users to send out opt-in requests from the chatbot backstage.
A. Via Post reply
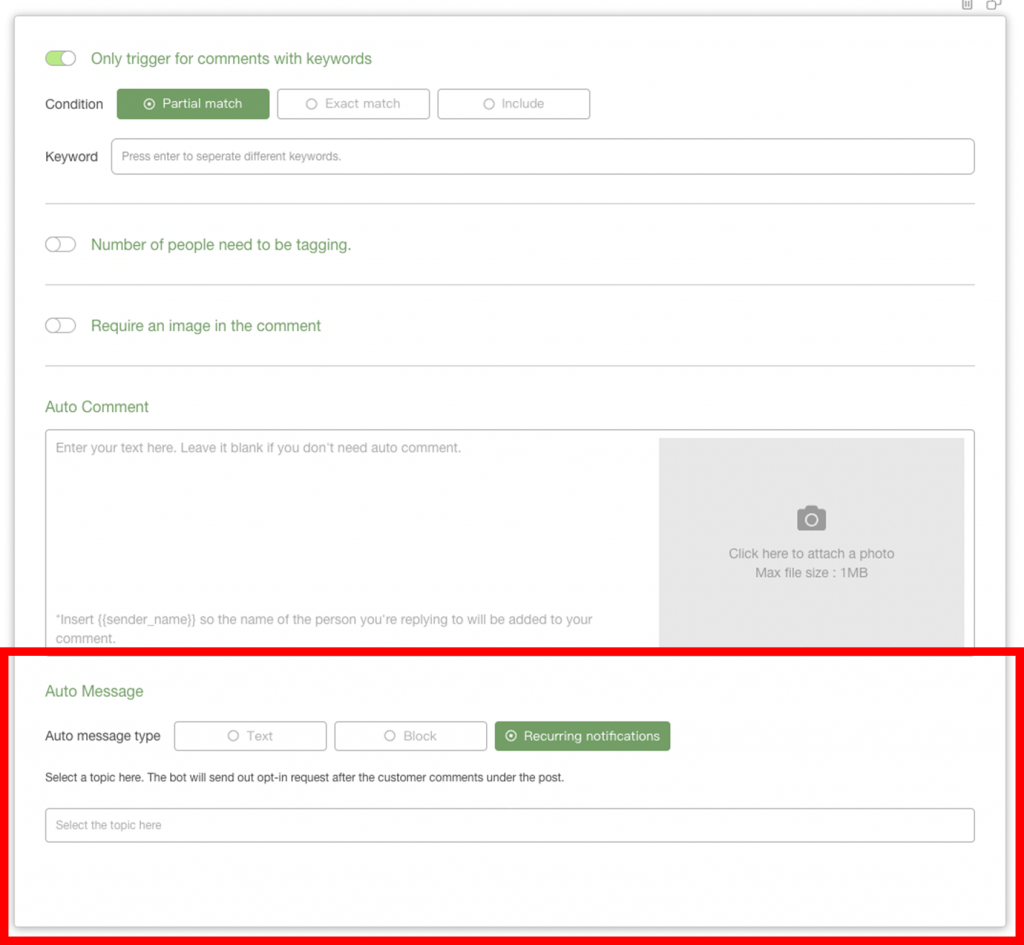
- Proceed to Post reply page and create a new Post reply
- Select “Recurring notifications” for auto message to let the system send out opt-in request to the customers automatically after they have commented under the target post (Every other setting remains the same as before)
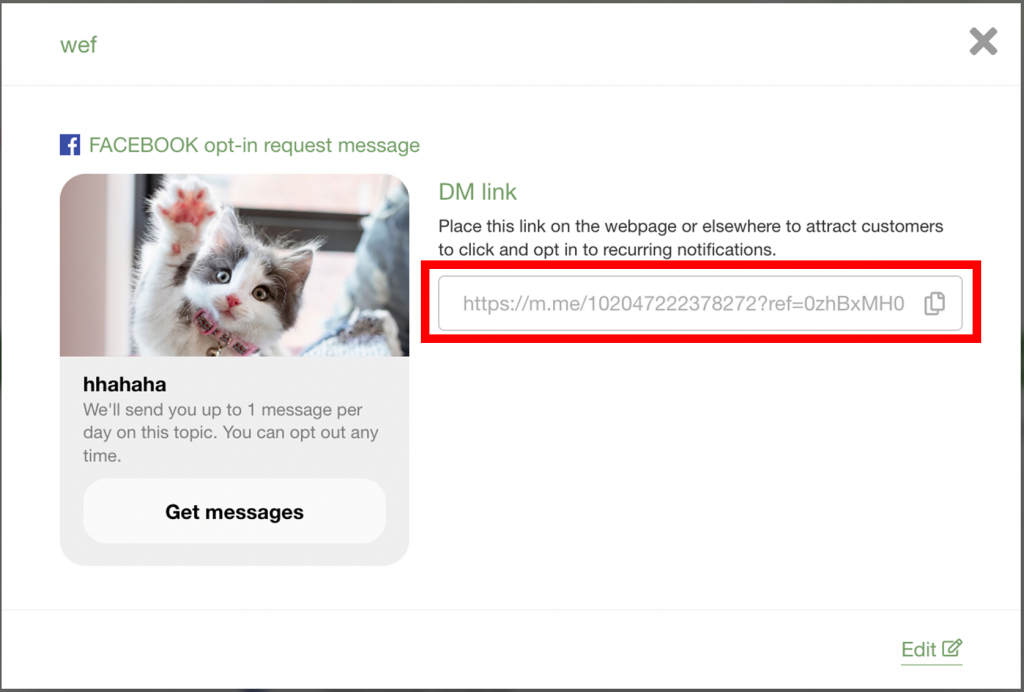
B. Via m.me link
- Click on the preview icon on each topic in the recurring notifications page, copy the link shown in the box and send the link directly to the customers or generate a QR code for offline customers to scan.
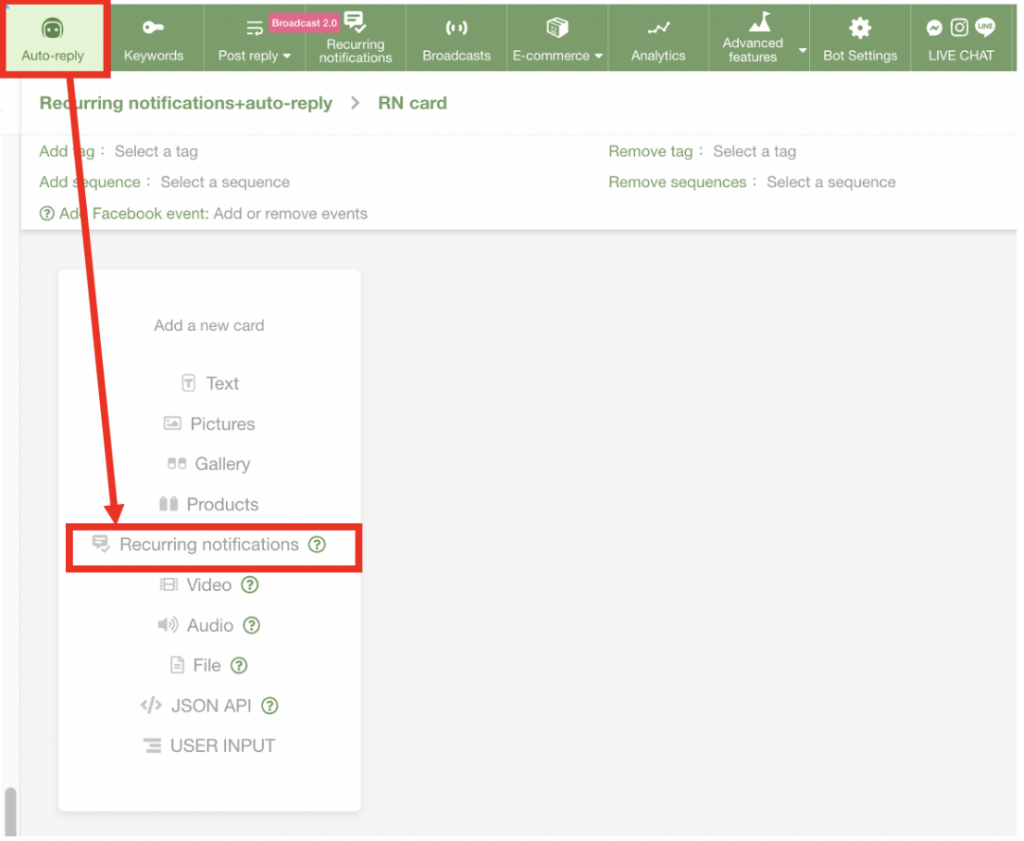
C. Via Auto-reply
- Add a “Recurring notifications” card in the block and draft your message as usual in the Auto-reply setting page.
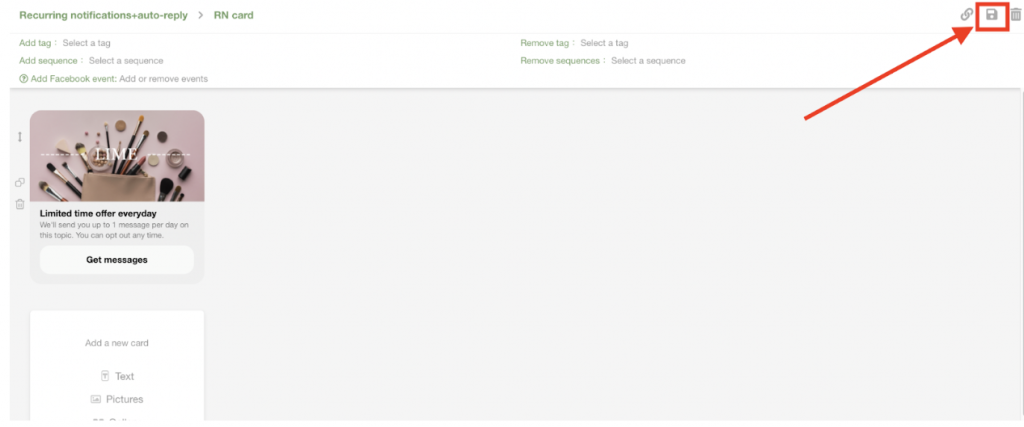
- Select a topic that you have created in advance and click “Confirm”

- Click the “Save” icon before leaving the page
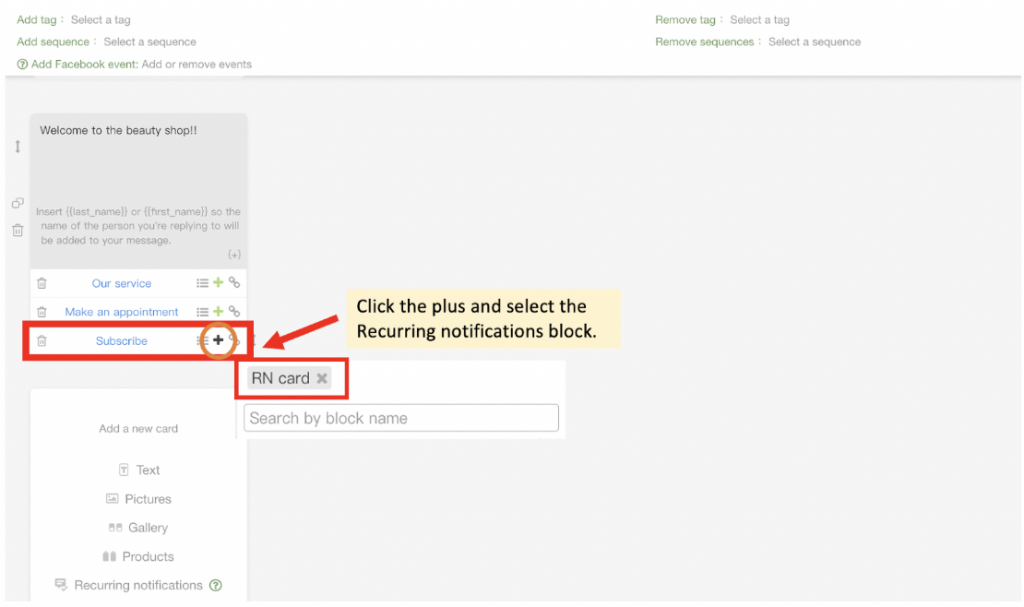
- After creating the block with the opt-in request, you may link the block to any conversations by putting it in buttons. Together with your appealing content, it can boost customers’ interest to click, receive the opt-in request and then subscribe. It works just like all the other blocks and therefore provides users with larger flexibility to integrate recurring notifications into normal conversation flow.
- Start accumulating your broadcast recipients with Recurring notifications and make your broadcasting more effective!
Step 3. Start broadcasting recurring notifications messages to customers
Tips: Decide whether to start sending recurring notifications messages to customers base on the number of subscribers and messages collected.
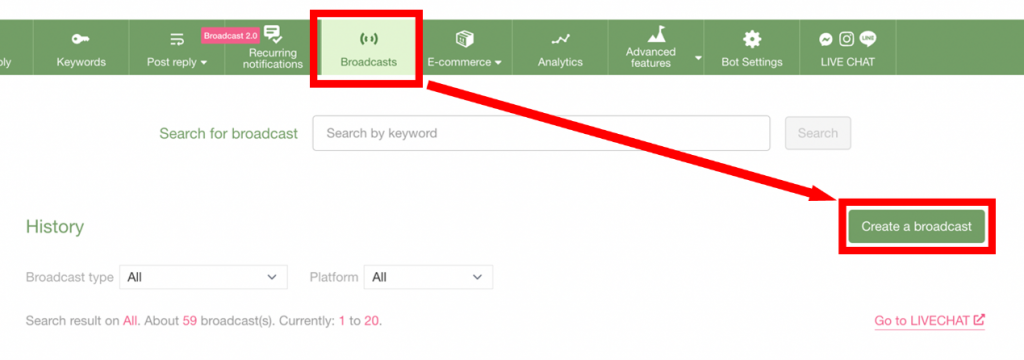
- Click on “Broadcasts” button on the chatbot toolbar
- Click on “Create a broadcast” on the right-hand side
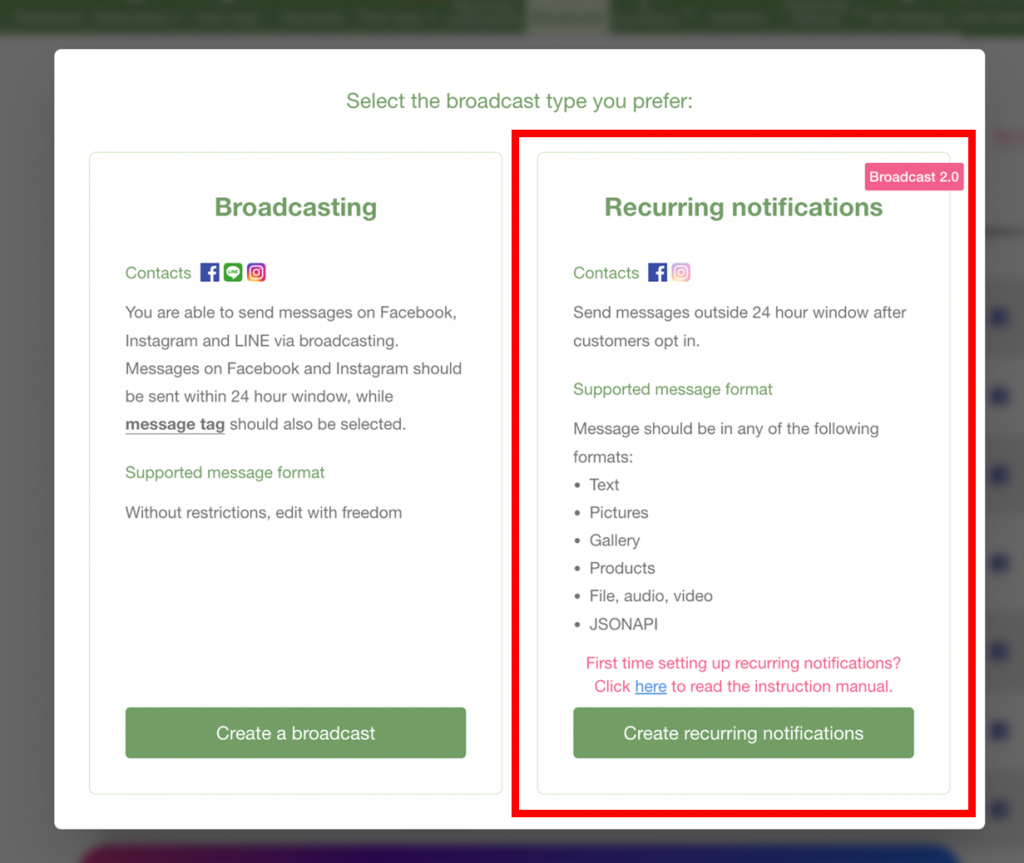
- Choose recurring notifications which is located on the right, and click on the “Create recurring notifications” button at the bottom
- After entering the broadcast-setting page, follow the steps as usual as all settings remain the same with original broadcasting.
** Click HERE to learn more about “Broadcasts”
Tips: Kindly be aware that only one card is permitted for every recurring notifications message!
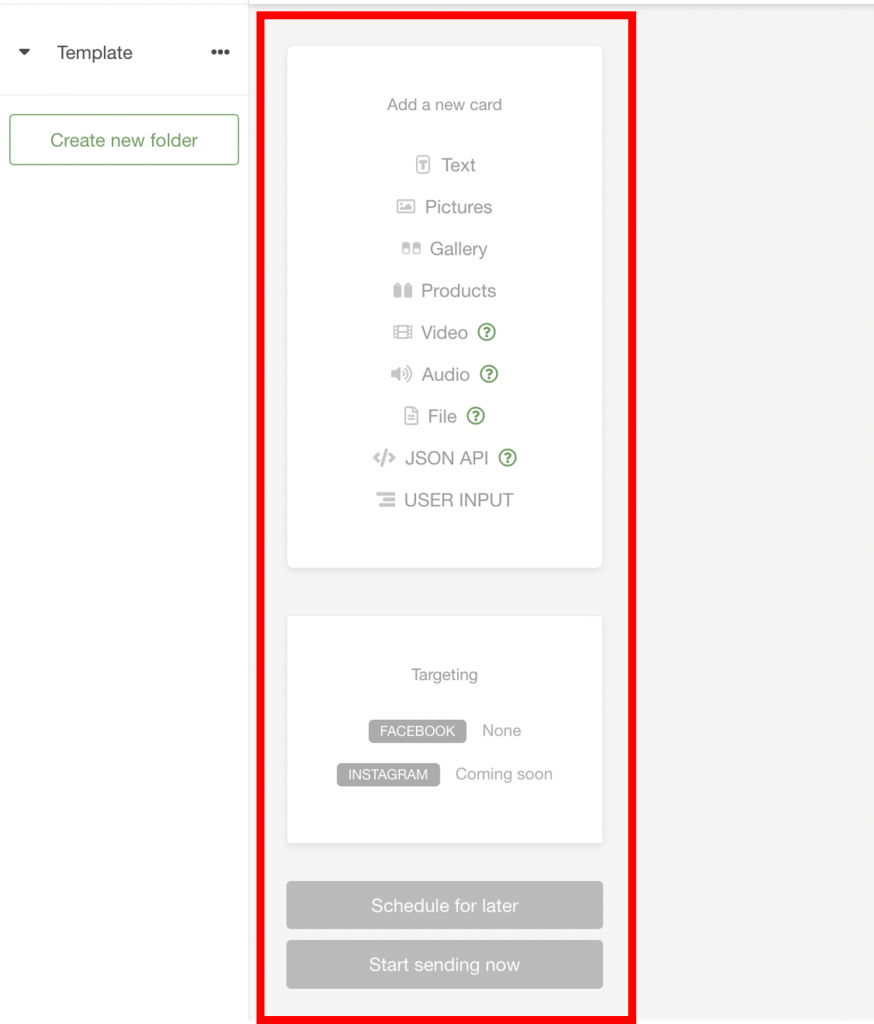
- Craft your message and select the platform that you would like to send the message.
Tips: Be noted that the platform you choose here should be aligned with the platform you choose when setting up the specific topic.
- Choose “All” if you want to send the messages to all the subscribers; choose “Targeting” if you would like to filter your contacts
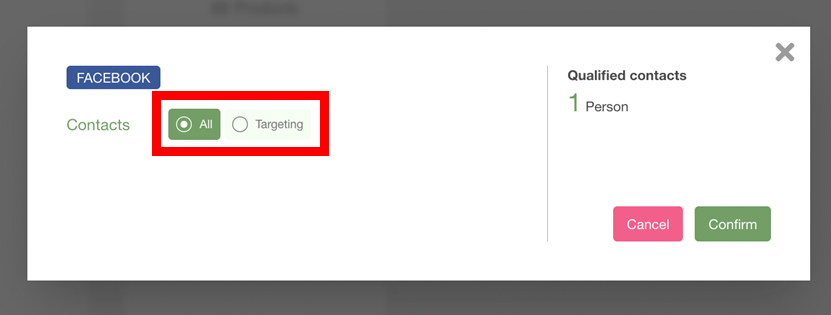
- If you choose “Targeting”, you can filter your contacts with different conditions like name, last interaction time, new subscribers or tags

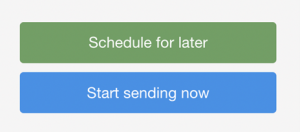
- After setting up the contacts, click to schedule the broadcast time or send out the message immediately