Connect your Instagram account to LIVECHAT, Empower your message integration centre!

by CHATISFY
0 Comment
  •  
  •  
  •  
  •  
  •  

Think of the time when you need to switch between Facebook/Instagram/LINE to manage numerous messages from customers, it is not only time-consuming but also troublesome. With our powerful LIVECHAT, CHATISFY’s users no longer need to hop between different social media platforms to manage messages separately. Instead, LIVECHAT has come into existence to tackle the problem and has created a more user-friendly integrated platform for customer services to handle all messages at a time.

(1) Switch your Instagram account from personal account to business account

*Click Here to register an Instagram account if you do not have one, or download the Instagram app to your mobile device and complete the registration. 

*If your account is a “creator account”, switch to business account as well. Please be noted that if you switch back to a personal/creator account afterwards, your LIVECHAT will stop operating.

Step 1.1: Access thesetting pageand select “Privacy and security”

Step 1.2: Click on “Switch to professional account”

*Please be noted that if your account is a “creator account”, you will see “Switch to personal account” instead. Switch back to personal account first, and then switch to professional account subsequently.

Step 1.3: SelectBusinessand click “next” twice

Step 1.4: Select a category according to your business type, click “Done”, then “Continue”

Step 1.5: Review your business information (Optional), click “Save”, then “Done”

*You are able to edit the information anytime after the account has been switched to business account successfully.

(2) Create a Facebook fan page

Step 2.1: Click the link to access the page 👉🏻 facebook.com/pages/create

Step 2.2: Name your fan page and select your business category

Step 2.3: Click “Create page”

*Other information like Bio, Image and cover photo are optional, you may come back to edit these afterwards.

(3) Link your Instagram account to your Facebook fan page

Step 3.1: Access the homepage of your fan page and proceed to settings

Step 3.2: Click on “Linked accounts”

Step 3.3: Go to “Instagram” and click “Connect Account”

Step 3.4: Allow access to Instagram messages in Inbox, click confirm, then log in to your Instagram account.

Step 3.5: Now you have successfully linked the Instagram account to your fan page

(4) Create a new LIVECHAT chatroom

Step 4.1: Click on “Create new chatroom”, name your chatroom, select the time zone and get started

(5) Connect your Facebook fan page to LIVECHAT

Step 5.1: Click on the “+FB page/IG account” button

Step 5.2: Select the fan page that you would like to connect and click “Connect”

(6) Connect the Instagram account to LIVECHAT

Step 6.1: Click on the “+Instagram” button

*The system will automatically connect to the Instagram account that is binding with the Facebook fan page selected in the prior steps

Now you have successfully connected the Instagram account to your LIVECHAT!

Learn more about how to let chatbot respond all comments automatically for you:

 Set up Instagram Post Reply with CHATISFY
 Set up Story Reply with CHATISFY

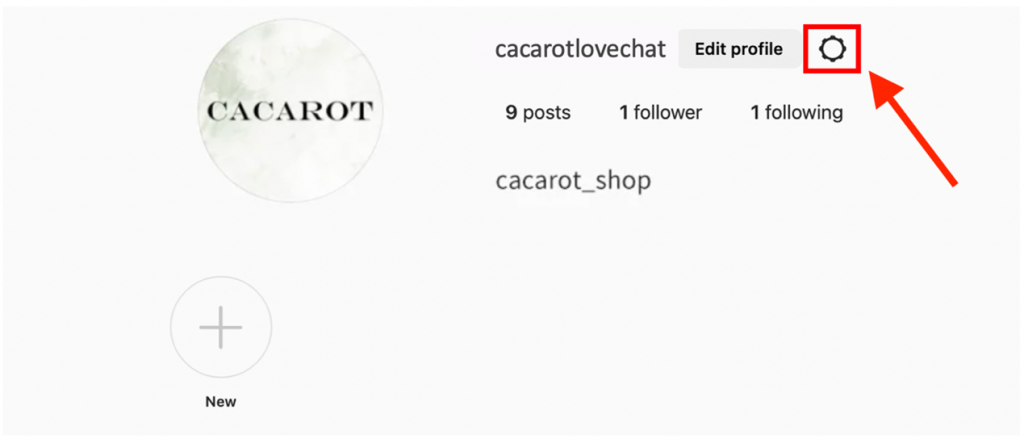
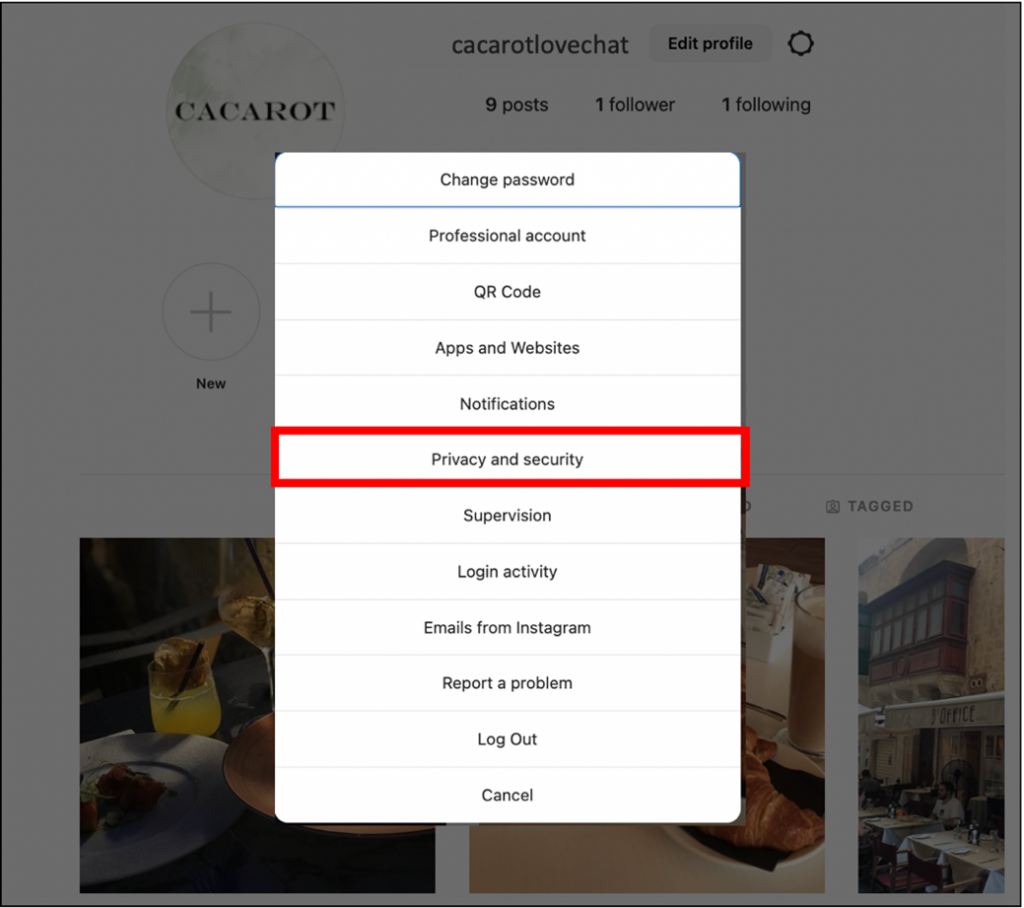
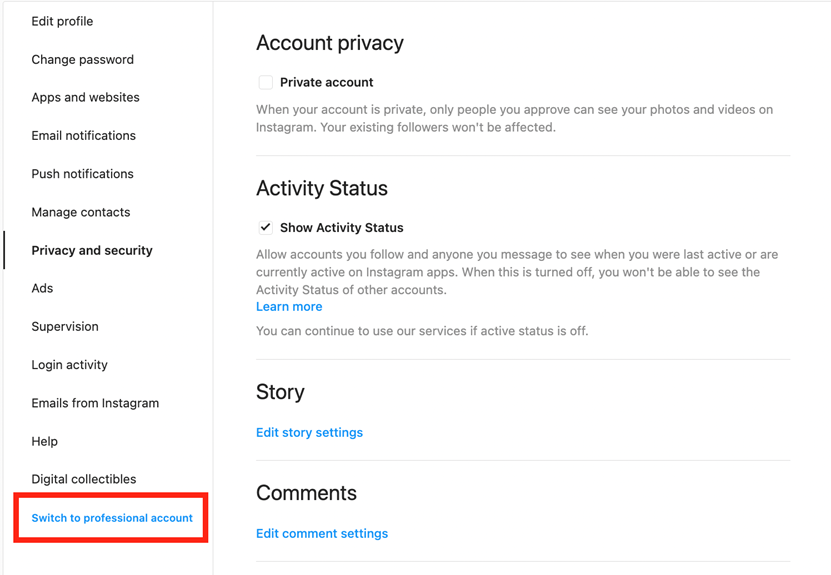
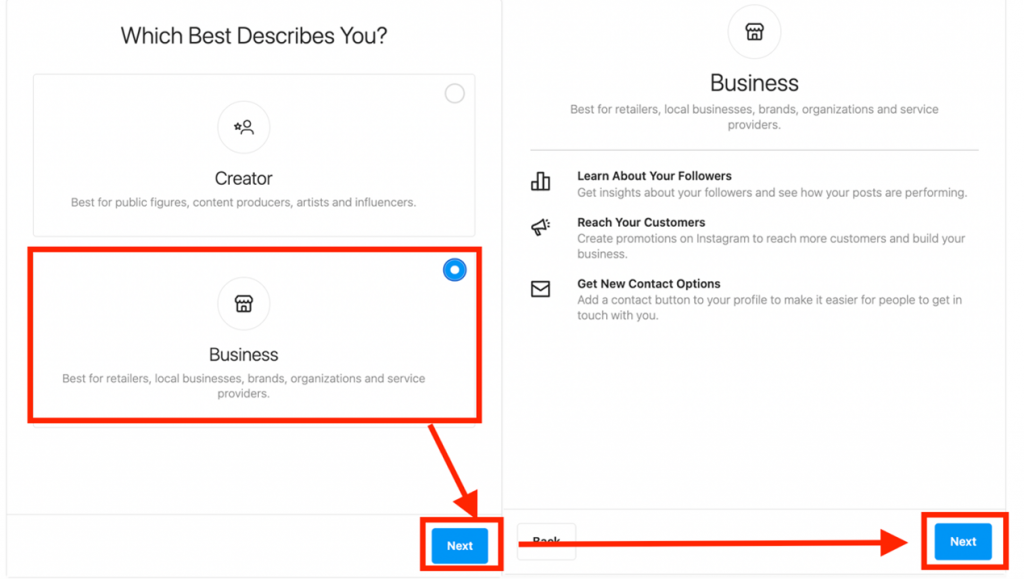
Your Instagram account should be set as follows:

  1. be switched to a business account
  2. be connected to Facebook fan page

You may send text, images, ecommerce products, audio, videos, documents and even default template messages to your customers in LIVECHAT.

There might be several reasons why this problem occurs:

  1. You are not the admin of the Facebook fan page
  2. Your Instagram account has yet been connected to the Facebook fan page
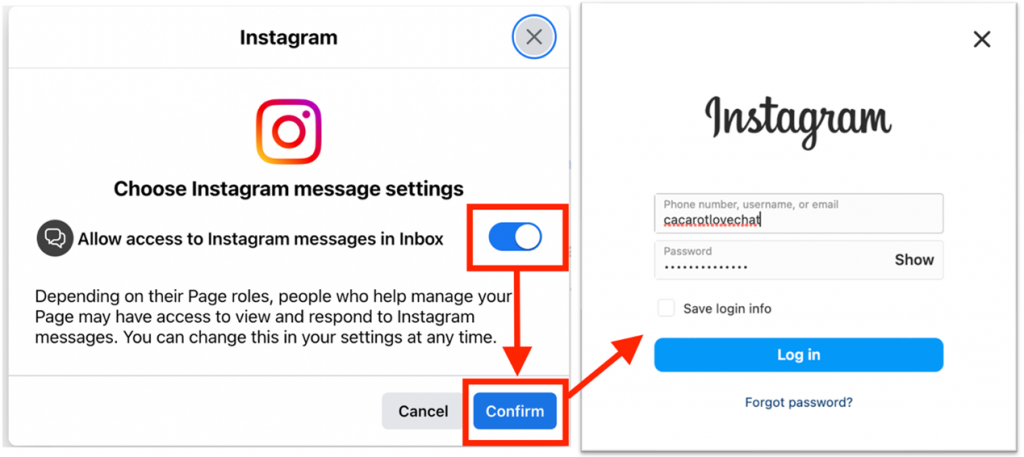
  3. You haven’t allowed access to Instagram messages in Inbox
  4. Your Instagram account is not a business account

Access the message inbox in the Meta Business Suite of your fan page, go to the 【Instagram】 section and see whether dm messages exist. If yes, it means that you have allowed the access to Instagram messages in Inbox; if you see “confirm Instagram message access” sign, click “start” and toggle on the pop-up message shown below:

You may open the Instagram app on your device, proceed to account settings and check on the third option of the list:

  • If it shows “Professional”, it means that it’s now a business account
  • If it shows “Creator”, it means that it’s now a creator account
  • If it shows “Privacy settings”, it means that it’s now a personal account

If you are currently not a business account, click the “Account” option and swipe down to the very bottom. Click on “Switch the account type” that is written in blue and follow the steps mentioned above in this article to change your account type.

Make sure you meet the following criteria first:

  1. You are the admin of the fan page
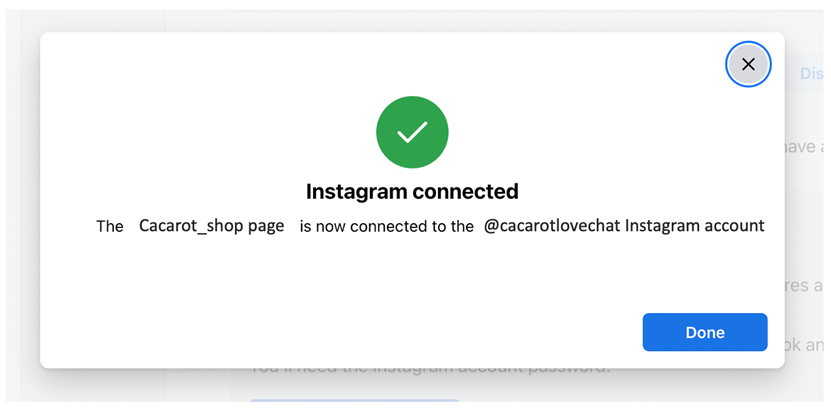
  2. Your Instagram account has already been connected to the Facebook fan page
  3. You have allowed access to Instagram messages in Inbox
  4. Your Instagram account is a business account

If you have met all the requirements above, try the following 2 ways to debug:

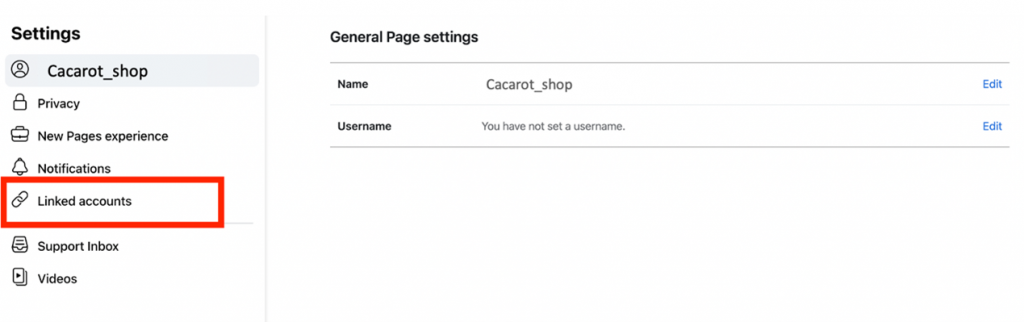
  1. Access the 【Linked accounts】page in your Facebook fan page settings and check whether the “Verify connections” alert has popped up. If yes, try to double check the connections by following the instructions given.
  2. Access the 【Linked accounts】page in your Facebook fan page settings to disconnect the Instagram account linked to your Facebook fan page and reconnect it again, make sure to toggle on “Allow access to Instagram messages in Inbox”.

CHATISFY provides chatbots that integrate customer service, ecommerce and data analysis into 1 platform! Our chatbots embrace a variety of features such as Auto Reply, Keywords, build-in forms and so on to make every interaction with the customers impressive.

No more than 5 minutes to get everything ready!

-Start now: Get started FREE
-About us: CHATISFY website


  •  
  •  
  •  
  •  
  •  

相關文章

Comments