For small business owners or e-commerce starters, it is difficult to build up a website of his own due to the expensive cost and all the trouble comes with it. On CHATISFY, you can start your Messenger store with our “E-Commerce” feature, add new products, set up shipping and payment in just a few steps!
First, go to “Products” : Add new product
➤ Steps: Add product > Edit product image, name, description and price > Done
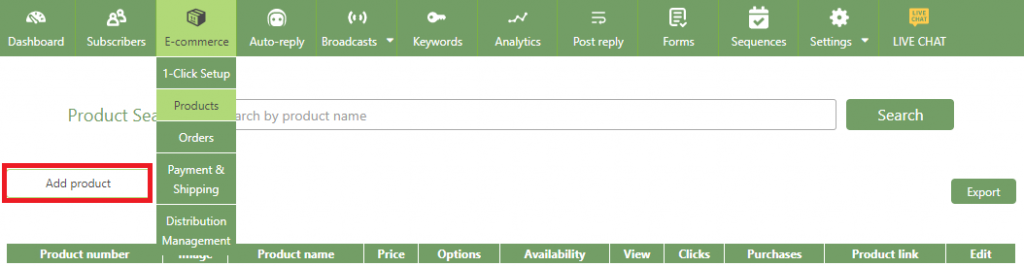
![](https://blog.chatisfy.com/wp-content/uploads/2019/10/電商設定_圖1-1024x267.png)
Step 1. Add product
![](https://blog.chatisfy.com/wp-content/uploads/2019/10/電商設定_圖2-1024x1004.png)
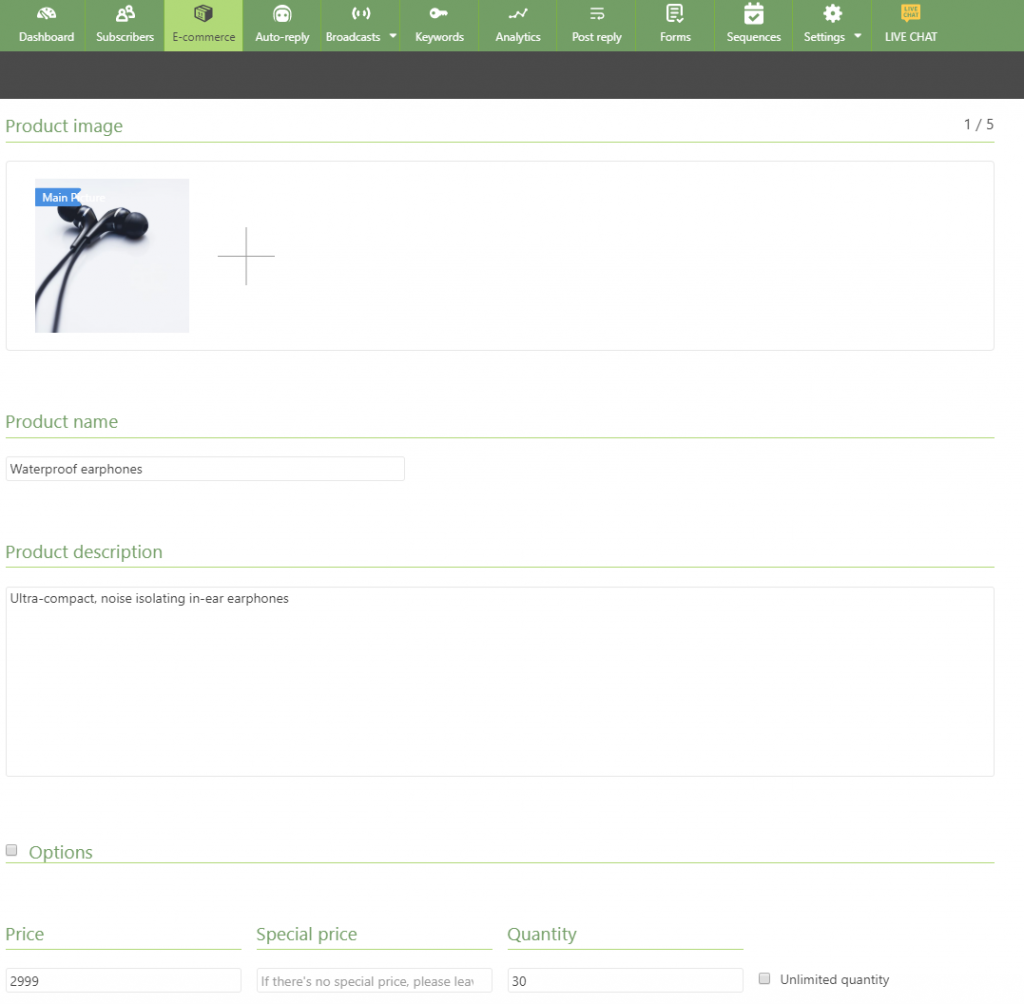
Step 2. Edit product image/name/description/price
![](https://blog.chatisfy.com/wp-content/uploads/2019/10/電商設定_圖3-1024x760.png)
Step 3. Hit 「Save」 – Done
Learn more : Build Up Your “Product Inventory”
Second, go to “Payment & Shipping”
➤ Steps: Select shipping methods > Select payment methods > Done
![](https://blog.chatisfy.com/wp-content/uploads/2019/10/電商設定_圖4-1024x431.png)
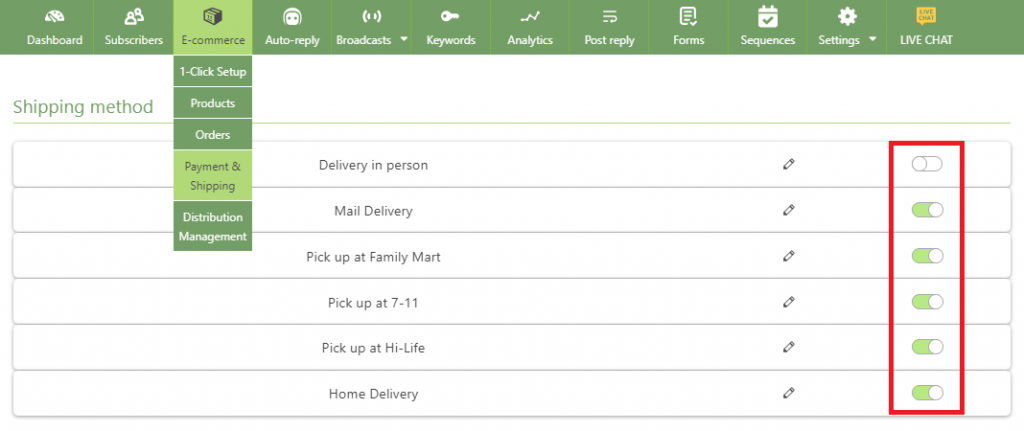
Step 1. Select the shipping methods you provide
![](https://blog.chatisfy.com/wp-content/uploads/2019/10/電商設定_圖5-1024x358.png)
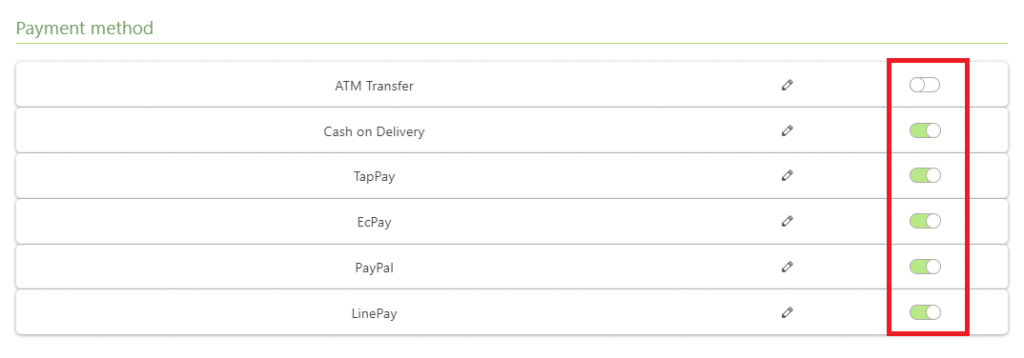
Step 2. Select the payment methods you accept – Done
Learn more : Set Up “Payment and Shipping” In One Page
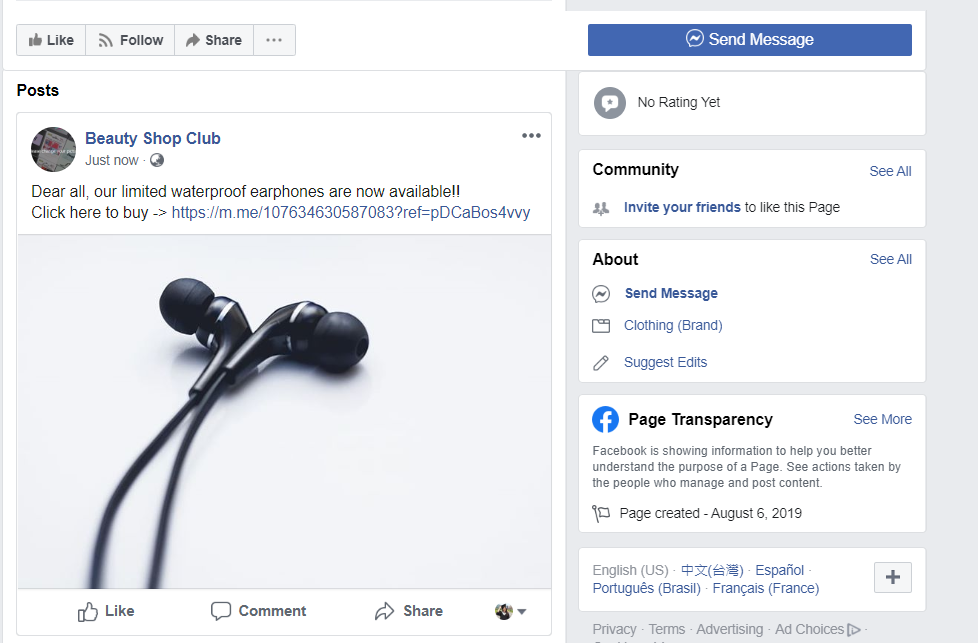
Now, let’s put your products in the conversation to allow users to purchase.
![](https://blog.chatisfy.com/wp-content/uploads/2019/10/電商設定_圖6.png)
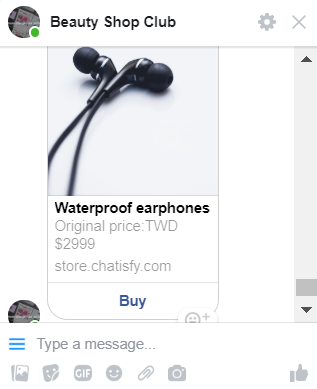
Customer can shop around in your Messenger store!
![](https://blog.chatisfy.com/wp-content/uploads/2019/10/電商設定_圖7.png)
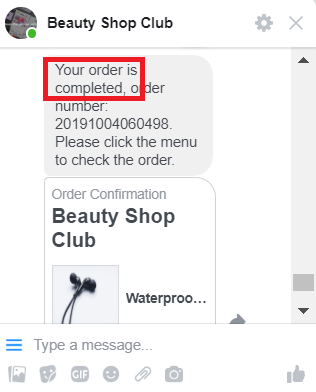
Customer places an order
Learn more : Launch Your Messenger Store
Third, go to “Orders” : manage your orders!
➤ Steps: Click ‘Orders’ > Update fulfillment status and/or payment status > Confirm
![](https://blog.chatisfy.com/wp-content/uploads/2019/10/電商設定_圖8-1024x302.png)
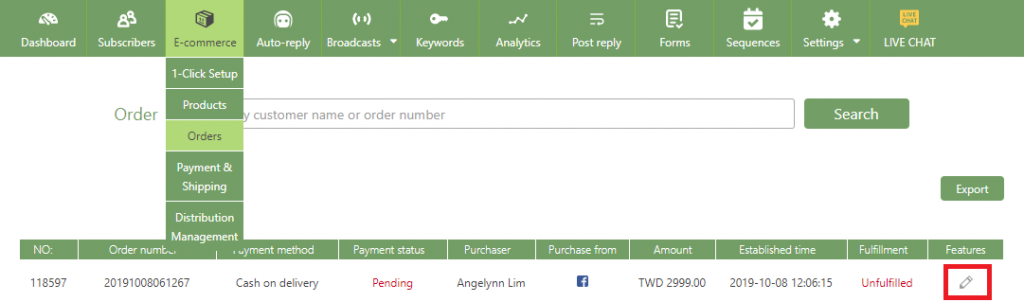
Step 1. Click the ‘pencil’ icon on the right.
![](https://blog.chatisfy.com/wp-content/uploads/2019/10/電商設定_圖9-1024x608.png)
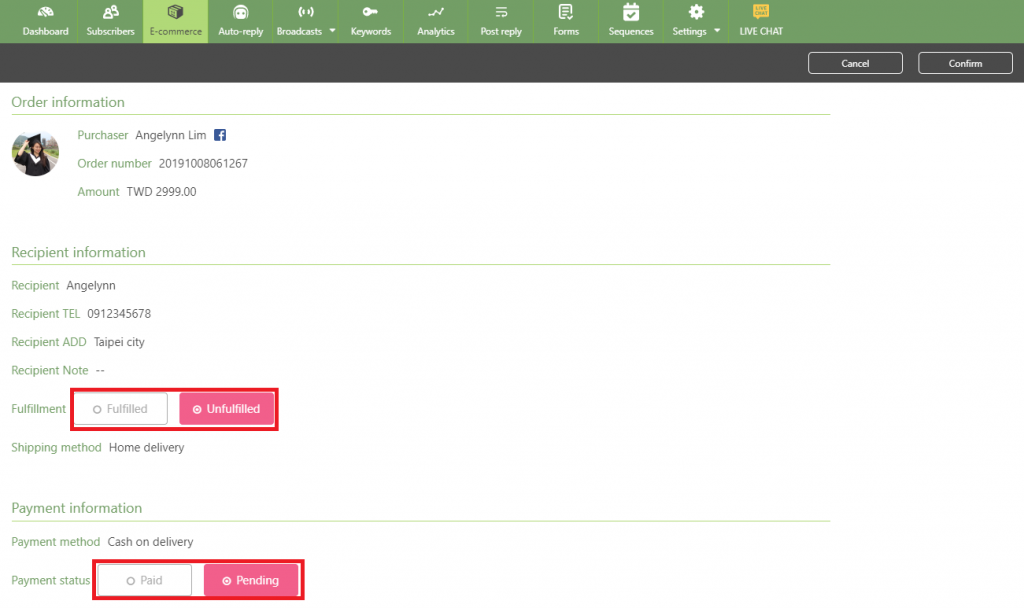
Step 2. Update fulfillment status and/or payment status
![](https://blog.chatisfy.com/wp-content/uploads/2019/10/電商設定_圖10-1024x630.png)
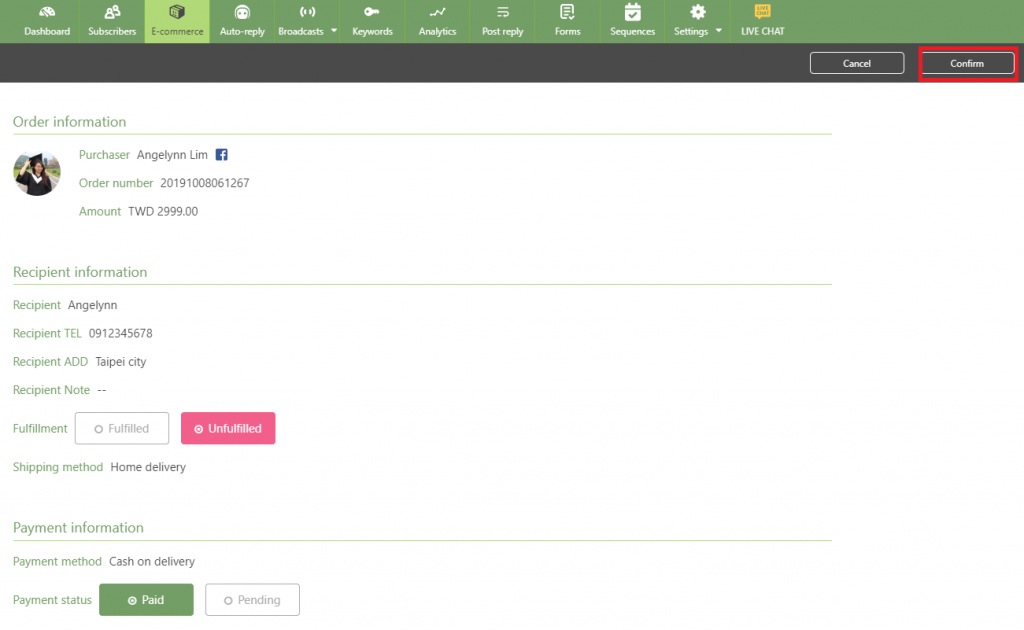
Step3. Click 「Confirm」 – Done
Congratulations, you’ve set up 「E-commerce」 successfully!
➤ Now you have your own Messenger store which allows customers to purchase anytime!
![](https://blog.chatisfy.com/wp-content/uploads/2019/10/電商設定_圖11.png)
Online business – Customers can shop in your Messenger store.